Yesterday I picked up the Baby Blanket again! That’s the cheddar and indigo quilt I’m making for the cat.
I’d been feeling daunted by the task of basting. I’ve never really basted anything before. If I remember right, for the Bear Trap I never basted, which led to some less-than-smooth areas on the back. I haven’t washed that yet so I’m guessing those wrinkles will even out in the washing process…but since it’s a throw pillow cover, it really doesn’t matter.
Yesterday I talked to my lovely support group about the basting process. I had put everything I thought I’d need for this by the dining room table, which is of course the only flat hard surface big enough for the task. The floors are not an option partly because if I get down on the floor I’m never getting up again, but also because the hardwood floors aren’t totally smooth and the stone floors have grout lines. I wanted a perfectly smooth surface like all the books say.
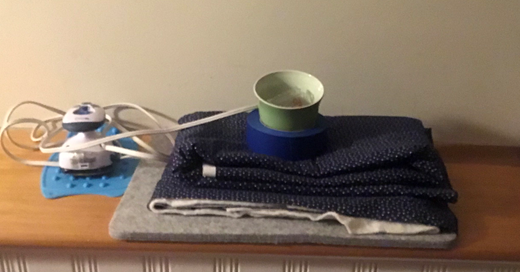
Before I met up with my support group for our video chat, I told them I’d be basting to help with accountability. I started by pressing the quilt top again, since it had been sitting folded up for a couple weeks. It had a ton of wrinkles so I’m glad i took the time to press again! I pressed from the wrong side first, with all the seams, then I flipped it over and briefly pressed the right side (the pretty side that will be on display when it’s done). I pressed the backing fabric too — the big piece of fabric that will be, well, the back of the quilt.
I laid out the backing fabric on the table, wrong side up. I tried to use painters tape to tape it to the table and keep it in place, again like all the books say, but the painters tape didn’t stick to the fabric! Some tape from the first aid kit worked, though. The plastic kind with little grids on it. I bet fabric tape from the first aid kit would have been best but I didn’t think of it. I did think of using some type of clamp to clamp it to the table, but I didn’t think we had any. In retrospect, we have some pretty cool clamps we use for line-drying laundry which I think would work great. Next time!
What the books say about securing your backing fabric to the table, or floor, tends to be either MAKE SURE IT’S TAUT or MAKE SURE IT’S NOT TOO TAUT. So I’m going to share my perspective on this after reading a bazillion different instructions on prepping for basting:
You want your quilt backing fabric to be flat and smooth, but not stretched. If it’s not smooth, you’ll end up with a non-smooth quilt back. If it’s stretched tight though, when you untape/unclamp it after basting, the backing fabric will return to its unstretched position and you’ll still end up with an unsmooth back.
I decided to care only a medium amount about how smooth the backing fabric was. I feel like that is a great amount to care about this particular topic, and would do the same next time.
Before trying to tape the backing fabric down, I folded it in quarters — in half one way and then in half the other way — so it would be a smaller square. That way I could note the half-way points both vertically and horizontally. Again — all the books say to do this! And I found it very helpful. I folded the batting the same way, and the quilt top.
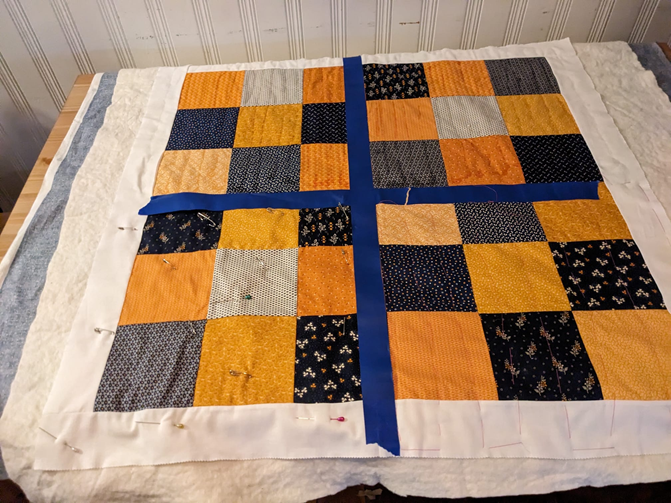
Nothing I’ve read talks about how to make sure your quilt top is straight when you prep to baste. I’m super confused why this isn’t a priority, especially when so many instructions are so focused on precision. So I came up with an idea to keep the quilt top straight. Since it’s all squares of the same size, I put a piece of painters tape along the middle seam. I figured the tape would stay pretty straight, and make the fabric straight too. Of course the tape didn’t stick that great, but I think it did what I wanted it to do. I used one strip of tape vertically and one horizontally, keeping it pretty much straight.
Group Wisdom
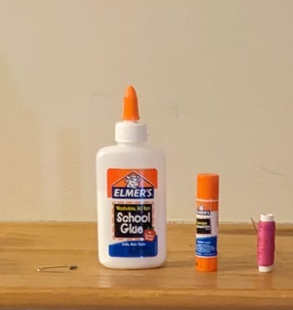
Then I told the support group about the different methods of basting, and how I wasn’t sure which one I was going to try. Pin basting and spray basting seem the most common these days, but I don’t want to spray chemicals around cuz I tend to be pretty sensitive to strong smells lately. (This recipe for looks pretty cheap and inoffensive, but I don’t love smelling alcohol.) I’ve also seen tutorials on basting with glue or glue-stick, and I’ve seen thread-basting mentioned but not very widely. There’s also a tool you can use to put basting tacks into fabric, maybe in the family of a staple gun, but it looks like it requires some hand strength and some money neither of which I’d like to devote to basting any more than necessary.
So the lovely support group asked me about the different methods and which might be the most work. I honestly didn’t know, since I hadn’t tried them and I know that my hands and arms can be pretty weak and/or easily tired out, but also these techniques require cognitive skills for keeping three layers of a thing smooth and coordinated… but each method might require different parts of my brain.
So with the wisdom of the group, I agreed to try one method per quarter of the quilt: the top half of the quilt I would use glue (liquid glue for the top-left, glue stick for the top-right); then I’d pin-baste the lower left, and thread-baste the lower right.
This is enough words for one post: I’ll leave you with what it looks like post-basting, and I’m planning to write another post sharing more about each of the methods, and which method I’m expecting to use most going forward.
But spoiler alert: I DIDN’T HATE ANY OF THEM.

Leave a comment